Have a news story for Floorscape? Get in touch with us to submit editor@floorscape.org.uk
Have a news story for Floorscape? Get in touch with us to submit editor@floorscape.org.uk
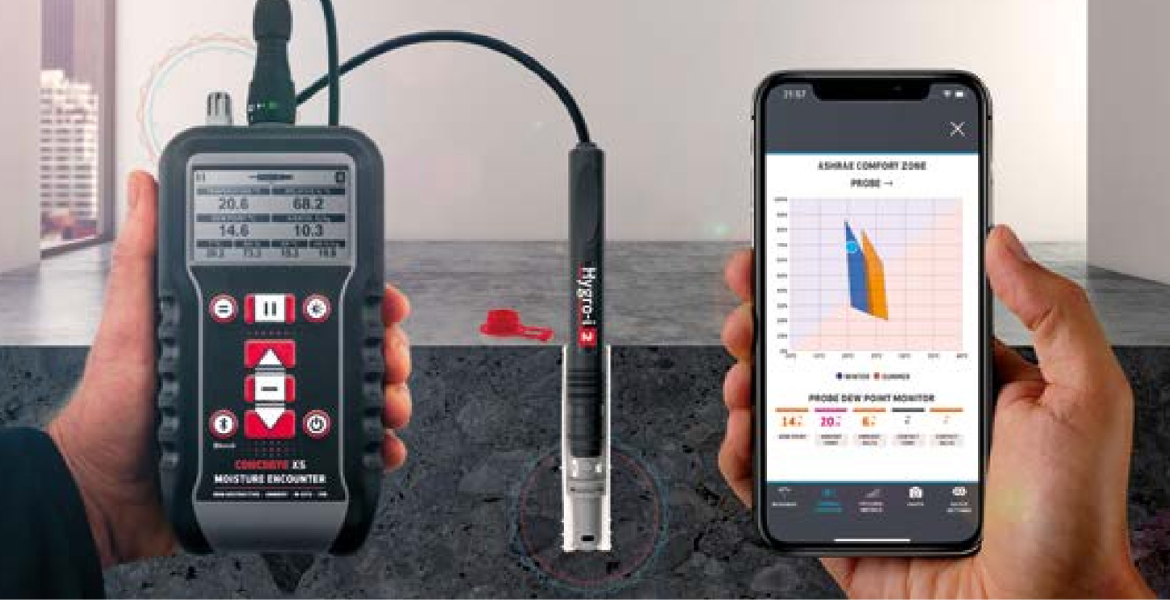
The hygrometer sleeve method (also called the in-situ method) was introduced in the UK in 2011 with the revision of BS 8201 and also included in the 2017 revision of BS 8203 and the 2021 revision of BS 5325. It involves inserting a relative humidity probe directly into the slab/screed and allowing the sensor to equilibrate with a small pocket of trapped air to achieve an equilibrium relative humidity reading.
The main advantage over the humidity box test is that because the airspace is situated inside the slab, it can act as a better insulator against temperature change, thus producing more stable results.
The main disadvantage is the destructive nature of the test and, in particular, the problem of not being able to drill into screeds where underfloor heating (UFH) is installed without an exact knowledge of where pipes are situated.
It is important to note that British Standards recommend that, after drilling, the hole must be allowed to cool for a period of no less than 72 hours with the proprietary sleeve in place before inserting the probe as readings taken in a warm hole may not give an accurate reading. Please refer to probe manufacturer’s guidelines for further clarification.
Relative humidity probes should not be exposed to high levels of humidity (>93%) for extended periods (i.e. > 24 hours) as this may cause the readings to drift.
Therefore, upon inserting the probe into the sleeve, as soon as the reading has climbed above the required reading (i.e. 75% or other reading specified by the manufacturer for the product), the probe can be removed and it may be recorded that the slab or screed is too wet and further drying or a surface damp proof membrane (DPM) is required.
The method is performed as follows:
For more contract flooring technical advice, visit the CFA Guide to Contract Flooring.
For specific references to acceptable equilibrium relative humidity (ERH) limits and other key updated guidance, the CFA has recently published a member-only guidance note on moisture measurement for in-situ probe method, accessible in the General Guidance section of the CFA’s Member Area.
Find more information on the hygrometer box method on Floorscape.


Floorscape aims to serve as a valuable resource for both
the contract flooring
industry and
associated parties including architects, designers, main
contractors, shopfitters, builders
and
clients and is fully supported by the Contract Flooring Association.